A library of ideas
Your next print
No models found
Try another search or clear your filters.
Build beyond the print
Explore electronics projects and experiments at Tricky Circuit.
A library of ideas
Try another search or clear your filters.
Explore electronics projects and experiments at Tricky Circuit.
Start with your board. Adjust the room around it, then take the geometry to your slicer.
Built-in parametric toolDrag to rotate · + / − to zoom · arrow keys
Open top · no lid, mounting posts or holes
Width × depth × height
Preview and STL use the same validated dimensions.
Build a divided box up to 200 × 200 mm: open top, acrylic sheet grooves or a separate printed sliding lid. Export box and fit-coupon STLs; test fit before printing the full set.
JavaScript is required to edit dimensions, preview the box and generate an STL. The purpose and limits below remain readable without it.
Drag to rotate · + / − to zoom · arrow keys
Open top · uniform cells · dividers reach the full inside height
Length × width × height · nominal geometry
Acrylic: print one guide body and test it with the real sheet cut to the sample dimensions. Printed coupon: two closed pieces, with a 10 mm layout gap; slide the tongue into the guide after printing.
Preview and STL share the same validated shape; STL is rotated to Z-up.
Lid modes leave 0.6 mm above the dividers and 0.3 mm above the lowered front wall. The printed plate has a 0.3 mm lower-edge chamfer. Lip overlap and shelf bearing differ because of this chamfer. There is a rear stop, but no tested lock or seal. Cut an acrylic rectangular blank from the measured sheet; no acrylic lid STL is generated.
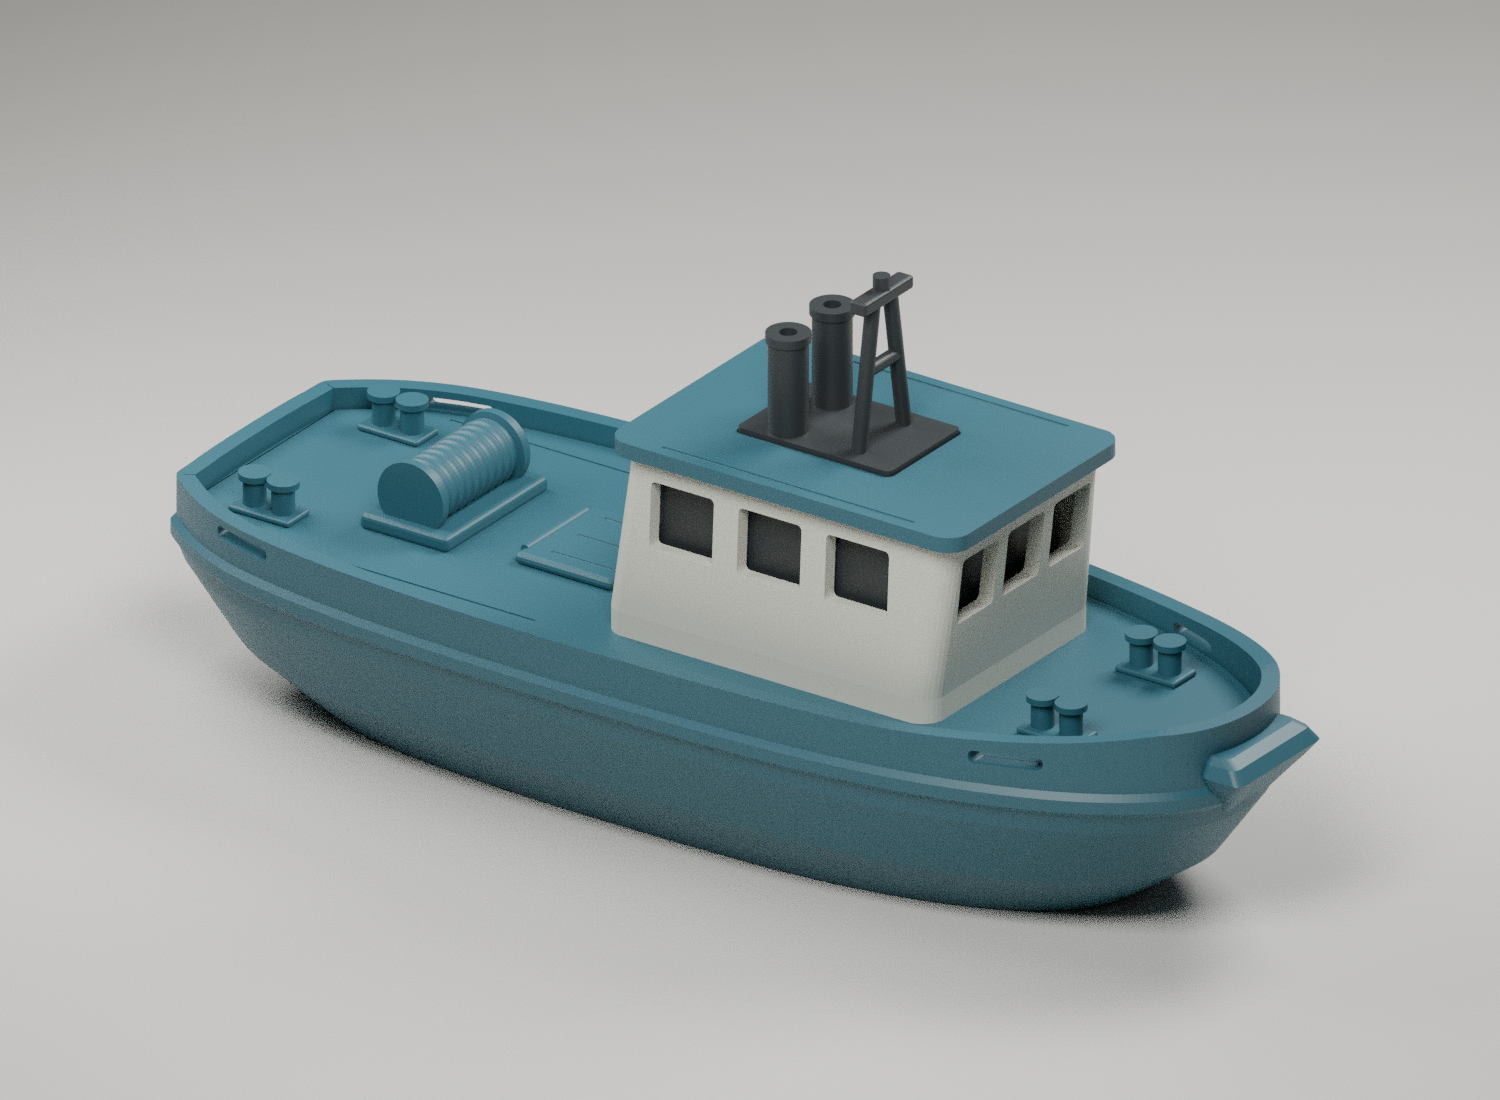
Studio render
CAD render of the assembled kit, not a photograph. Download the separate parts below. Physical printing, assembly and fit have not been tested.
Drag to rotate · + / − to zoom · arrow keys
Original 3D geometry · no print photographs available
Preview colours are illustrative. STL contains geometry, not these colours. Choose filament colour in your print workflow.
Model kits
Physical print: not tested
A 189.9 mm display harbour tug with an open working deck and winch. Six main parts and two optional fit tests. Printing, assembly, fit and buoyancy are untested.
Assembled: 189.9 × 71.8 × 90.3 mm
Physical printing and fit are untested.
TUG 184 · Harbour tugboat kit An original stylized display tugboat, not a replica of a particular vessel. Assembled size: 189.9 × 71.8 × 90.3 mm. The name 184 refers to the original hull outline, not the final length including the fender. Six main parts and two optional fit-test pieces, one copy of each STL. Import in millimetres at 100%. Each part has its base at Z=0 and fits geometrically on a 220 × 220 mm bed. Check brim and machine limits separately. Print parts separately, not the assembled display scene. Separate colours can be printed one at a time on a single-extruder printer. The dark window liner is opaque; transparent glazing is not provided. Start with the fit pieces: pin diameter 3.6 mm and protrusion 2.6 mm. One-, two- and three-dot sockets are 3.9 / 4.2 / 4.5 mm diameter, giving 0.15 / 0.30 / 0.45 mm radial clearance. Socket openings are underneath; dots are on the opposite face. The middle socket corresponds to the wheelhouse locating fit. Test without force. This does not validate deck, window-liner or equipment fit. Assembly: 1. Lower the deck into the hull until it reaches the supporting ledge. The winch is aft and the fender is at the bow. 2. Place the wheelhouse on the three deck pins, with the door facing the winch. 3. Insert the dark window liner from ABOVE into the open wheelhouse, long direction along the hull. 4. Place the roof on the cabin rim, aligned with the sloped walls. 5. Lower the exhaust/radar platform into the roof recess. Mast toward the bow, exhausts toward the stern. 6. Dry-fit first. Secure with material-compatible glue if needed, following its instructions. No snap-fit or tested friction retention is provided; the roof and equipment require separate retention for reliable handling. Inspect bridges above windows and hull openings, the underside of the winch, bollards and horizontal mast parts. Supports may be needed. The mast, door handle, window liner and edges are delicate. The exploded render is an assembly guide, not a print layout. No floating, waterproof or radio-controlled capability is claimed. Not a safety-tested children's toy. Digital geometry has been checked. No machine-specific slicing, physical printing, strength or practical fit test has been performed. Print time and filament usage are unknown. Inspect all sliced layers, supports and first-layer adhesion. Render images show the model, not a printed product. STL contains geometry only, without colour. Editable source files are not included. Licence: CC BY-NC 4.0. Attribution: TUG 184 by 3D4.us. See LICENSE.txt.
Time and filament use, where available, are slicer estimates for a stated file and profile, not measured print results. Filament used is not the finished part’s mass. Missing values mean there is no verified slicing source.
Reviews and print reports are not available yet. Workshop review is a local demonstration and is not sent to the site.
Slicer estimate; varies with printer and settings.
Catalogue values use the first reviewed slicing source.
Approximate slicer values from the footer of a user-supplied G-code file, manually shared in chat.
Associated by object name, dimensions and preview. The G-code does not contain an STL checksum.
Settings describe the supplied G-code profile, not a verified match to your printer.
This file uses the geometry shown in the 3D viewer. Units are millimetres. Uploading your own files and 3MF support are planned for a later version.
Each part is a separate original STL. The assembled CAD render is not a combined printable file. Dimensions are width × depth × height in millimetres; check orientation and fit in your slicer.
Initial catalogue listing of unchanged original printable files and reviewed digital renders. Slicing and physical printing remain untested.
Noncommercial use only.
Original geometry and included print files only. Images and source project files have separate rights. Geometry may be converted to other formats for noncommercial use.
Credit 3D4.us, link the licence and indicate changes.
Purchases and subscriptions are future options, not active features.